Launch your RCS sender
After you create and test your sender, launch it to enable production RCS traffic in your target countries. Launching activates your sender with the RCS providers in each country you select.
The launch process has three stages: check launch requirements, request launch, and track approval.
The following video walks through the full launch process:
Launch requirements
Launch requirements differ by country and provider. Before you submit a launch request, check the requirements for your target countries to confirm your sender is eligible.
To discover launch requirements:
-
Go to Channels and Numbers > Channels > RCS Business Messaging.
-
On the Overview tab, select Discover launch requirements.
-
Select the country or countries where you want to launch your sender.
-
Choose the traffic origin:
- Local: You send traffic from within the selected country.
- International: You send traffic from a different country.
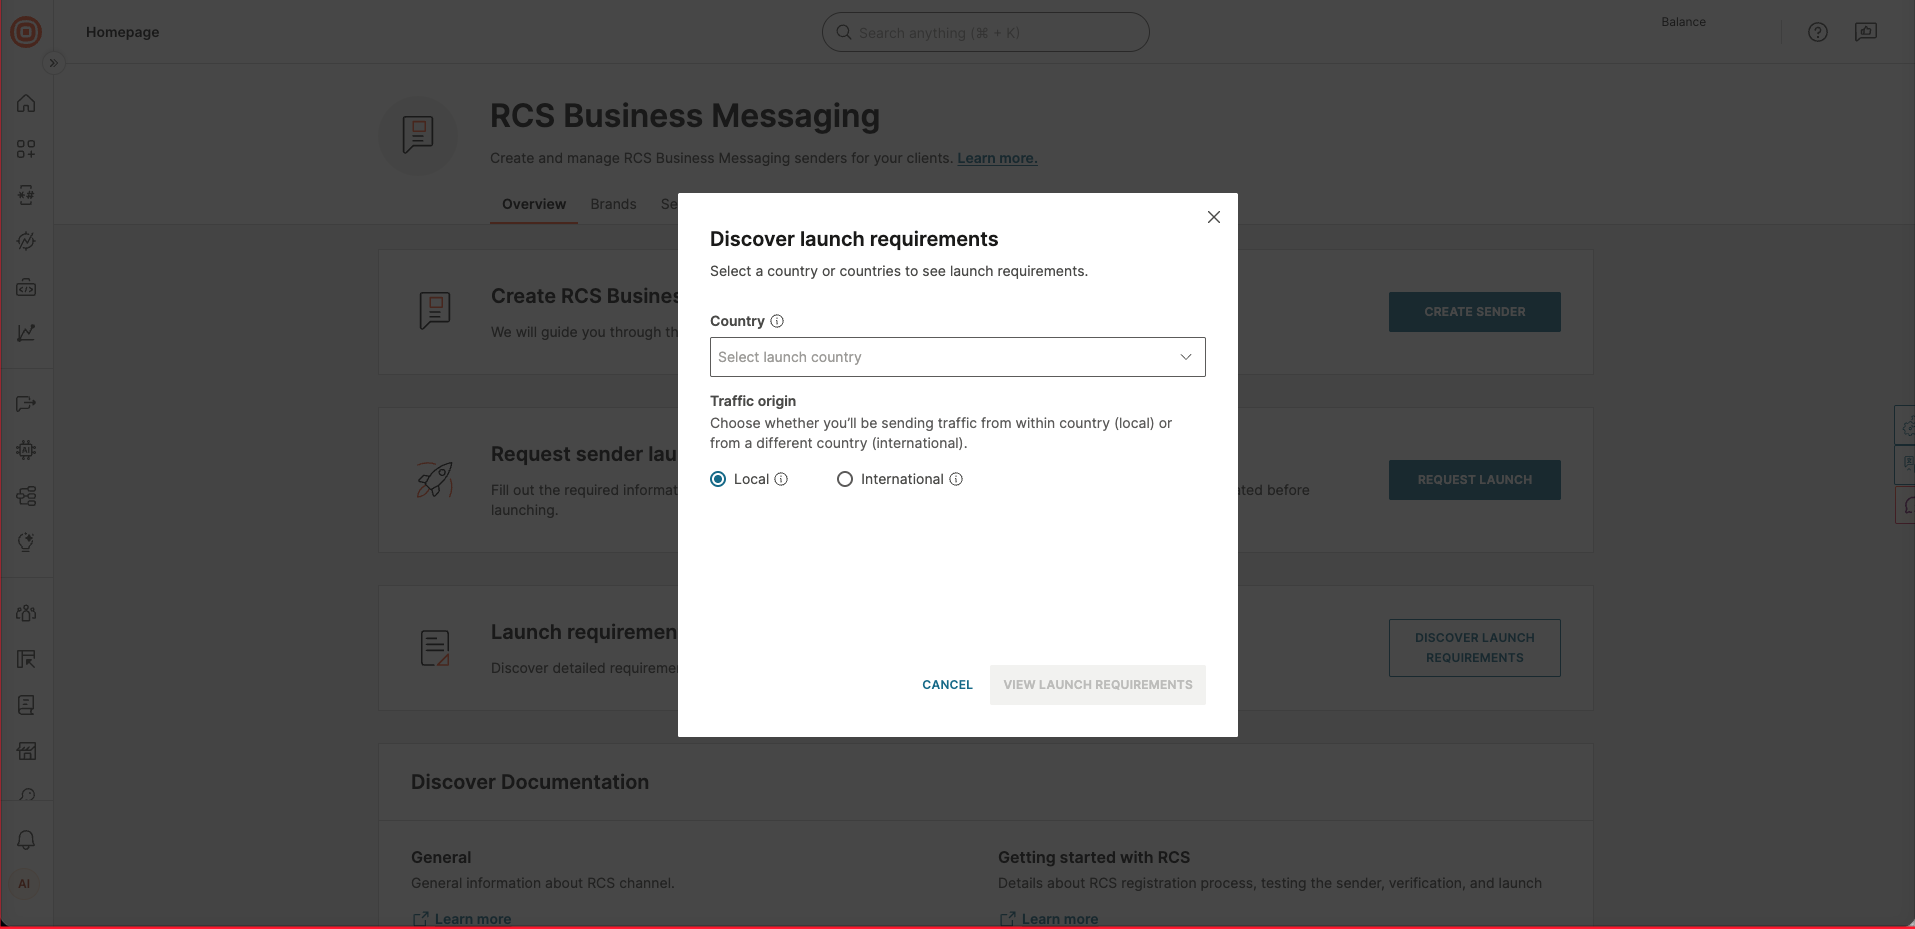
-
If you select a single country, you can also select specific carriers and providers.
-
Select View launch requirements to see the eligibility criteria and activation steps for each selected country.
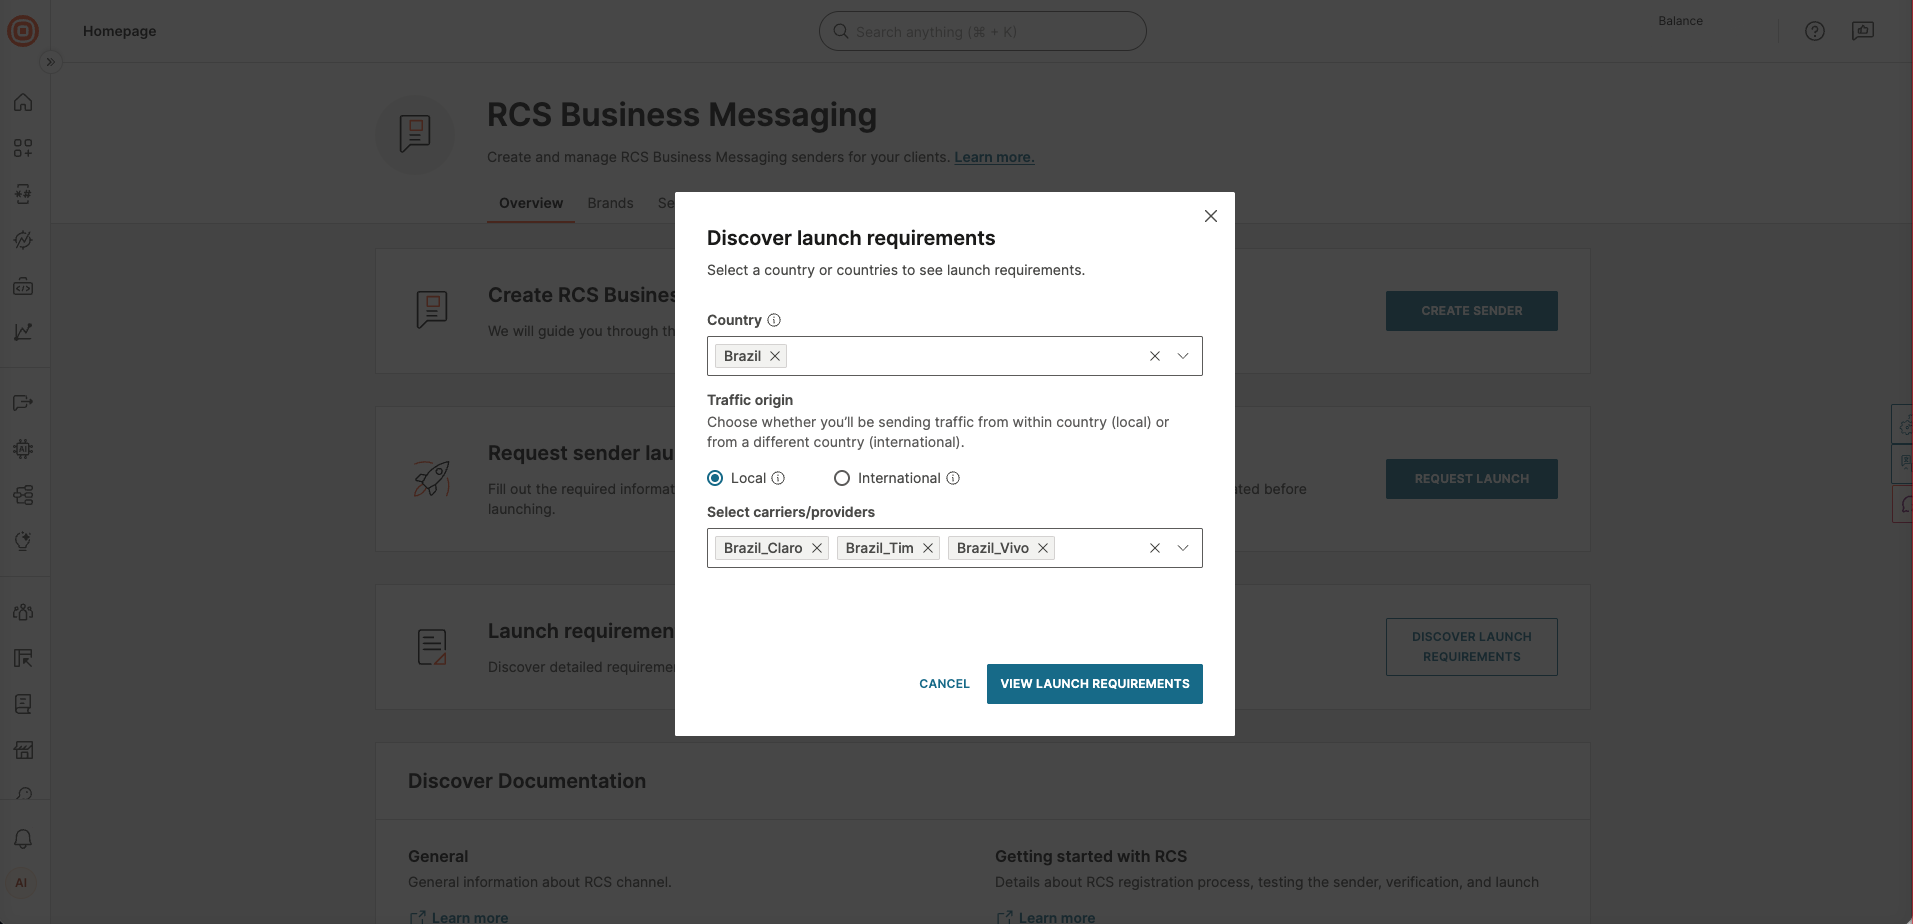
If you select more than one country, the provider selection is disabled. This may lead to different results in the launch questionnaires for countries that support multiple providers.
Confirm your sender meets all listed requirements before submitting a launch request.
Request sender launch
- Go to Channels and Numbers > Channels > RCS Business Messaging > Senders.
- Select the sender you want to launch.
- Select Request sender launch.
- From the list, select the country where you want to activate the sender.
- Enter the email address that will receive updates about the launch process.
- (Optional) Add additional information for your account manager.
- Select Next to fill out your request sender launch form.
You will receive an email confirmation once the launch request has been submitted successfully. For more information, see the RCS Sender launch tutorial.
Examples of information required for launch
| Info | Details |
|---|---|
| Branding |
|
| Brand point of contact |
|
| Agent experience |
|
| Usage |
|
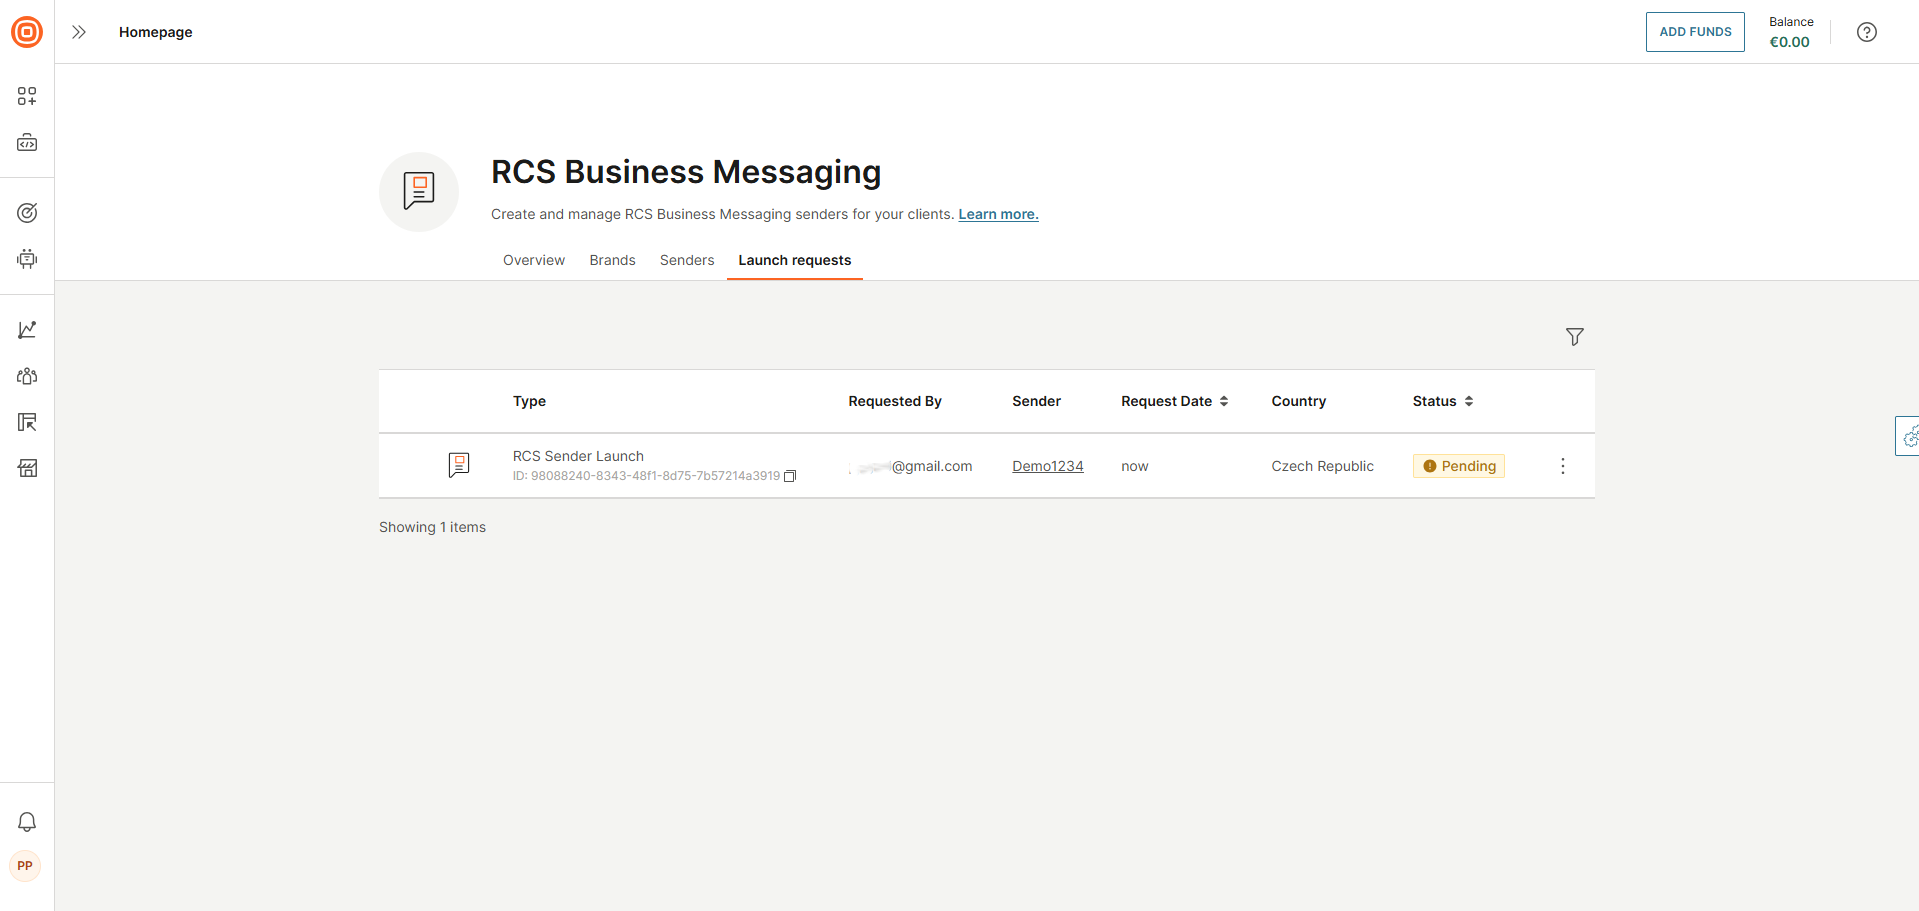
Track launch status
After requesting the launch, you can track its progress per provider in each country where the launch was initiated.
- Go to Channels and Numbers > Channels > RCS Business Messaging > Senders.
- Select the sender you want to review.
- Open the Launch requests tab.
Here you can view detailed information about the current launch status and any updates from Infobip or the mobile network provider.
Do not edit the sender while the request is processing.
Submitting this request triggers an offline process involving you and your account manager, who coordinates the exchange of all required information to complete the sender launch.
The information requested can vary depending on the carrier.
Sender verification and launch approval
Infobip requests the RCS technology provider or MNO to verify your sender. Some MNOs may require you to complete additional checks to use their services. Contact your Infobip account manager or support for more information.
After launch approval:
- Your sender is live and approved for production traffic.
- You can send RCS messages and campaigns without limits to destinations where your sender has been launched.
- You do not need to invite the contacts as testers or safelist their numbers.
Once your sender is launched in a country, test devices from that country are removed. You can still add test devices for this sender in all other countries.