Marketing messages
Messenger marketing messages let you send promotional content to customers who opted in to receive messages from your Facebook Page. You can send these messages outside the standard 24-hour messaging window.
Marketing messages use a Notification Message Token (NMT), which is a separate subscription credential returned through an opt-in event. The NMT is different from the Page-Scoped ID (PSID) used in standard Messenger conversations. Always use the NMT as the destination when sending marketing messages.
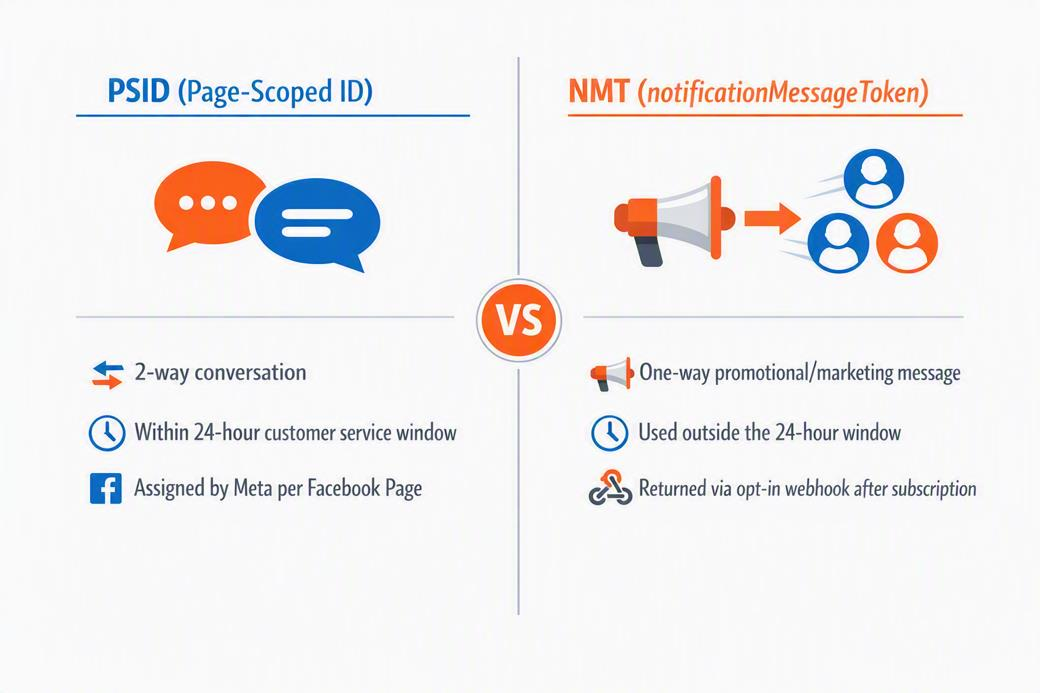
Do not use the regular Facebook user ID or PSID when sending marketing messages. The destination must be the notificationMessagesToken returned by the opt-in event.
Availability
Messenger marketing messages are available in selected regions.
Business onboarding regions
Businesses located in the following regions can be onboarded:
- Australia
- Brazil
- Chile
- Colombia
- Hong Kong
- India
- Indonesia
- Israel
- Malaysia
- Mexico
- New Zealand
- Peru
- Philippines
- Saudi Arabia
- Singapore
- Taiwan
- Thailand
- United Arab Emirates
- United States
- Vietnam
Recipient restrictions
Messages can be sent to subscribers in all regions except:
- Australia
- European Union
- Japan
- South Korea
- United Kingdom
For the latest availability, see the Meta documentation(opens in new tab).
Prerequisites
Before you can send marketing messages through Messenger, make sure you have the following:
- An Infobip account with Messenger marketing messages access enabled. Contact your account manager to enable the feature.
- A Facebook Page connected to your Infobip account under Channels and Numbers > Channels > Messenger > Pages. The Page does not need to be verified by Meta.
- An ad account connected through the marketing-messages onboarding wizard in the Infobip web interface.
- An API key scoped to call the Messenger APIs.
- (Optional) A webhook endpoint configured to receive opt-in, opt-out, and delivery events.
Connect the Facebook Page and ad account
Before you start the marketing messages onboarding, connect your Facebook Page.
Step 1: Connect the Facebook Page
- Go to Channels and Numbers > Channels > Messenger > Pages.
- Select Connect Account.
- Select Login with Facebook and complete the authentication flow.
- Select one or more Facebook Pages to connect.
- Select Confirm, then Finish.
Step 2: Enable marketing messages
After the Facebook Page is connected, enable marketing messages and connect the ad account.
- Go to Channels and Numbers > Channels > Messenger > Overview.
- Select the marketing messages onboarding banner.
- Select Marketing messages as the use case.
- Select your account type. Select I am admin only if both conditions apply: you are the administrator of the business portfolio, and the Page and ad account belong to that portfolio.
- Select one or more ad accounts to connect.
- (Optional) Configure automatic audience growth settings to invite recent subscribers to opt in.
- Select Confirm, then Finish.
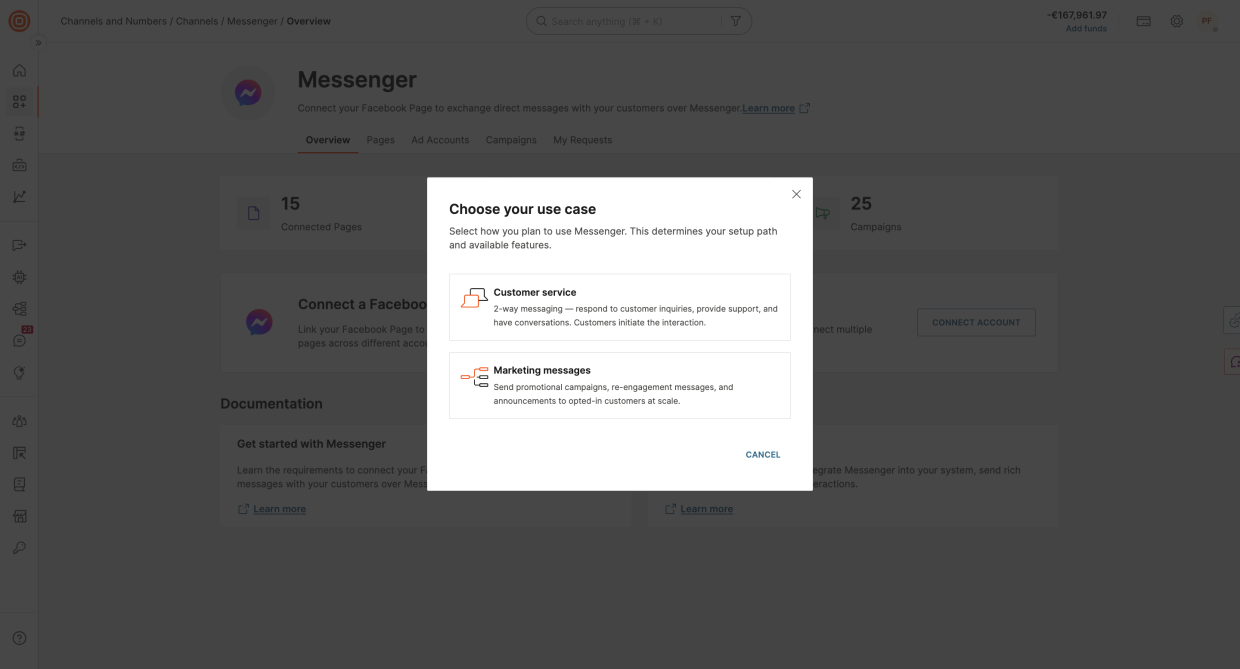
After the wizard completes, verify the ad account connection under the Ad Accounts tab. You can also confirm the setup by calling the ad accounts endpoint:
Use the returned id value as adAccountId when creating a campaign.
Collect the opt-in token
Marketing messages require an NMT collected through the opt-in flow. There are several ways to build the subscriber pool.
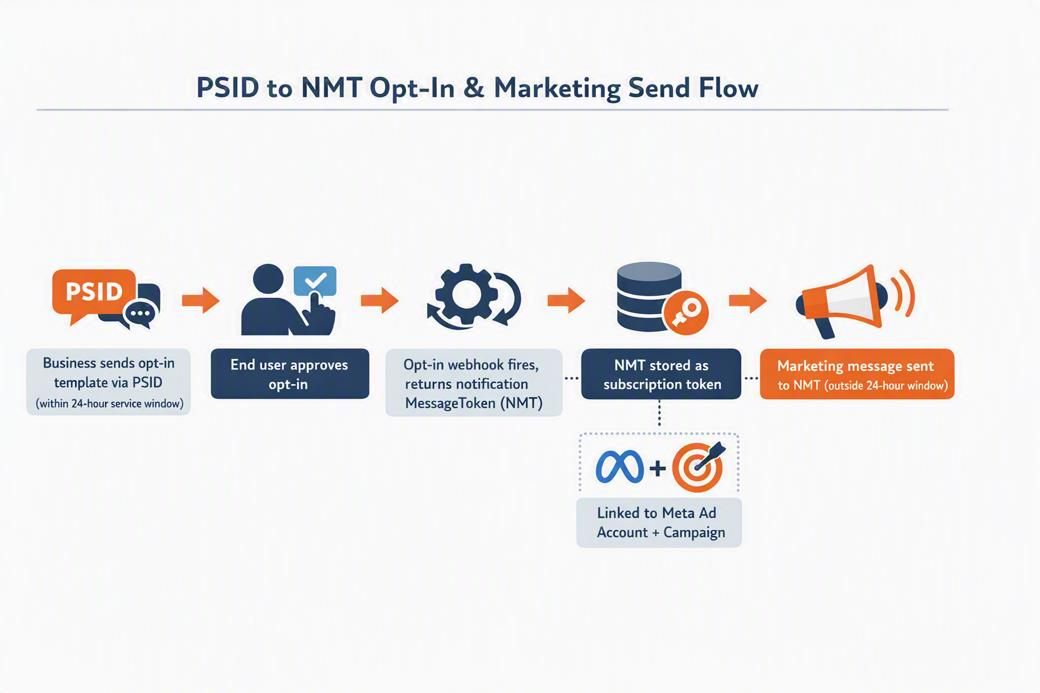
The paths to collect subscription tokens are:
- Opt-in message: Send an opt-in message to a user during an active Messenger conversation (within the 24-hour window). When the user accepts, Infobip receives a
CONSENT_UPDATEwebhook containing thenotificationMessagesToken. - Custom audiences: Upload hashed phone numbers or email addresses that you collected outside Messenger. See Custom audiences.
- Organic automations: Meta can automatically prompt users to opt in to marketing messages during certain interactions with your Page, such as when a user messages your Page for the first time. These automations are managed through Meta Business Suite. See the Meta organic automations documentation(opens in new tab) for setup details.
- Click-to-Messenger ads: Run ads that open a Messenger conversation with an opt-in message. When a user clicks the ad and opts in, you receive the NMT through the same webhook flow. See the Meta click-to-Messenger ads documentation(opens in new tab) for setup details.
Opt-in webhook
Subscribe to the Messenger CONSENT_UPDATE event through Subscriptions management. When a user opts in, you receive a webhook with the token:
Store the notificationMessagesToken value. This is the destination you use when sending a marketing message.
Opt-out webhook and subscription removal
When a user opts out, you receive an UNSUBSCRIBE event with userTokenStatus: "NOT_REFRESHED". Stop sending messages to the token immediately and update your suppression logic.
To programmatically remove a marketing subscription (for example, when a user opts out of all communications from the business), use the delete subscription endpoint:
For full endpoint details, see Delete a marketing subscription.
Custom audiences
Use custom audiences to reach customers whose phone numbers or email addresses you collected outside Messenger, for example offline or through a form.
- Collect opt-in through other channels, and get the customer's phone number or email address.
- Upload the hashed phone numbers or email addresses through Infobip to Meta. See Upload users to audience.
- Meta matches the data to Facebook profiles.
- Send marketing messages.
Keep the following in mind:
- The typical match rate is 20% to 70%.
- A custom audience must have at least 100 matched users to become active.
List active subscriptions
To check the subscription state for a Page, call the subscriptions endpoint:
The response includes the token, token expiry, and the next eligible send time (nextEligibleDatetime).
Create a campaign
Create a marketing campaign before sending messages. The campaign ties together the Page, the ad account, and the budget.
Create a campaign with the API
Budget values are in cents. Provide at least one of dailyBudget or lifetimeBudget.
The response returns a campaignId that you include in every marketing message send request.
For full endpoint details, see Create a campaign.
Create a campaign in the web interface
- Go to Channels and Numbers > Channels > Messenger > Campaigns.
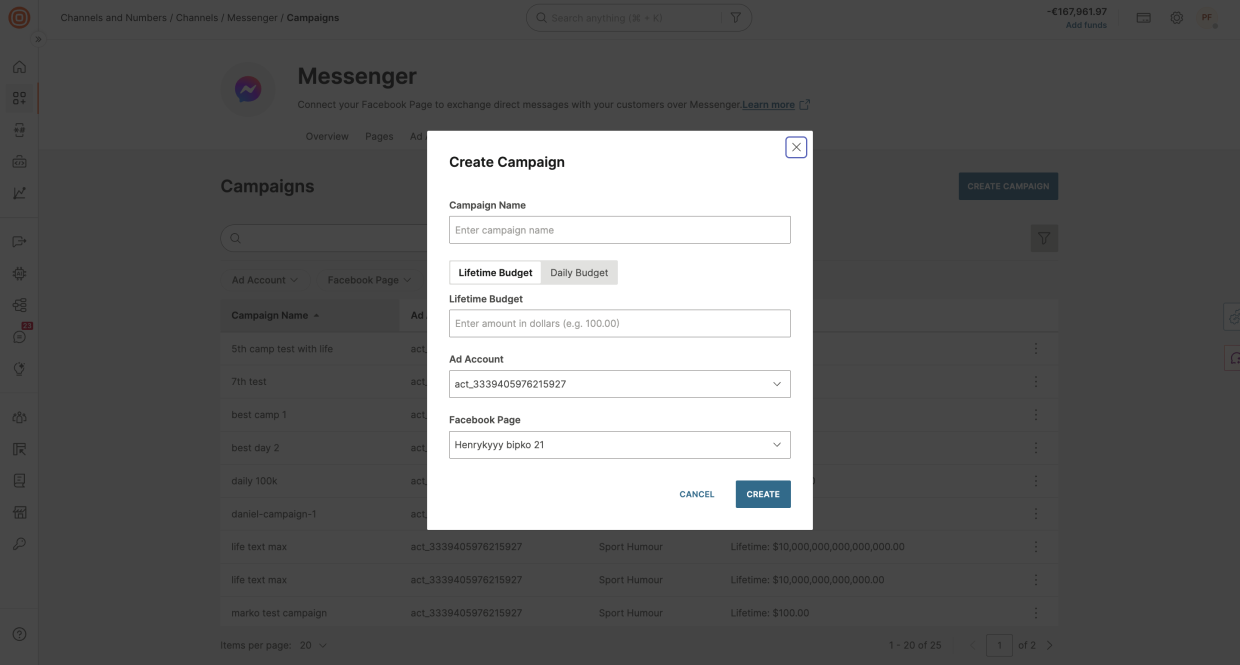
- Select Create Campaign.
- Enter the campaign name, select the ad account and Facebook Page, and set a lifetime or daily budget.
- Select Create.
Send a marketing message
Send a marketing message with the API
Use POST /messenger/1/messages with content.type set to MARKETING_MESSAGE and the NMT as the destination.
A successful response returns a PENDING_ACCEPTED status:
Supported content types for marketing messages: TEXT, GENERIC (single card or carousel with web_url/postback buttons), and BUTTON (web_url/postback only).
For full endpoint details, see Send a Messenger message.
Send a marketing message with Broadcast
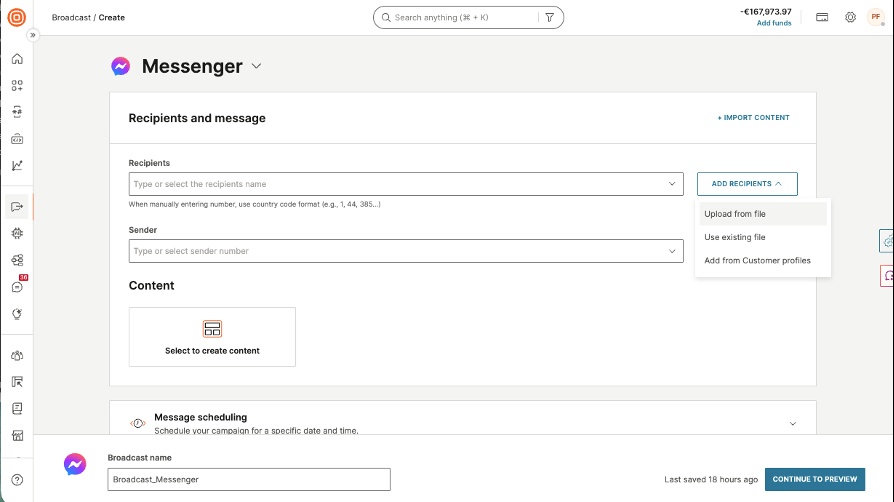
Use Broadcast to send a marketing message to a list of subscription tokens without calling the API.
Sending marketing messages through Broadcast is in Early Access. Contact your account manager for availability.
- Go to Broadcast > Create broadcast.
- Select Messenger as the channel.
- Add recipients by uploading a file with subscription tokens or selecting a People audience.
- Select the Messenger sender (Facebook Page) that matches the token source.
- Select the marketing message content type and the campaign created earlier.
- Review scheduling and tracking, then preview and launch.
Compliance
Marketing messages must follow Meta platform policies.
- Send marketing messages only to users who have opted in.
- Stop sending messages to users who have opted out. When you receive the opt-out webhook, remove the token from your send lists immediately.
- Do not use marketing messages for service or transactional communications. Use the standard 24-hour messaging window or message tags for those purposes.
- Feature availability depends on the country. See the Meta documentation(opens in new tab) for the list of supported countries.
For general Messenger compliance requirements, see Compliance and guidelines.
Troubleshooting
Message accepted but not received
- Confirm the destination is the subscription token, not the PSID or regular user ID.
- Confirm the token has not expired or been revoked by an opt-out event.
- Confirm the tenant has Messenger marketing messages access enabled.
Campaign creation fails with 400
- Check that
adAccountIdandpageIdbelong to the same connected setup. - Provide at least one budget field:
dailyBudgetorlifetimeBudget. - Budget values must be in cents.
No opt-in webhook arrives
- Confirm the webhook subscription is configured for the
CONSENT_UPDATEevent. - Confirm the user opted in through a supported Messenger flow.
- Verify the webhook endpoint is reachable and returns a 200-level response.
Was this page helpful?